
hello_world.md 4.6 KB
Hello, World desktop app
Let's put together a simple "hello world" desktop application to get acquainted with Dioxus.
In this chapter, we'll cover:
- Starting a new Dioxus project with Cargo
- Adding Dioxus as a dependency
- Launching our first component as the app root
A new project with Cargo
First, let's start a new project. Rust has the concept of executables and libraries. Executables have a main.rs and libraries have lib.rs. A project may have both. Our hello world will be an executable - we expect our app to launch when we run it! Cargo provides this for us:
$ cargo new --bin hello-dioxus
Now, we can cd into our project and poke around:
$ cd hello-dioxus
$ tree
.
├── Cargo.toml
├── .git
├── .gitignore
└── src
    └── main.rs
We are greeted with a pre-initialized git repository, our code folder (src) and our project file (Cargo.toml).
Our src folder holds our code. Our main.rs file holds our fn main which will be executed when our app is ran.
$ more src/main.rs
fn main() {
    println!("Hello, world!");
}
Right now, whenever our app is launched, "Hello world" will be echoed to the terminal.
$ cargo run
   Compiling hello-dioxus v0.1.0
    Finished dev [unoptimized + debuginfo] target(s) in 0.41s
     Running `target/debug/hello-dioxus`
Hello, world!
Our Cargo.toml file holds our dependencies and project flags.
$ cat Cargo.toml
[package]
name = "hello-dioxus"
version = "0.1.0"
edition = "2018"

# See more keys and their definitions at https://doc.rust-lang.org/cargo/reference/manifest.html

[dependencies]
Adding Dioxus as a dependency
To use the Dioxus library, we'll want to add the most recent version of Dioxus to our crate. If you have cargo edit installed, simply call:
$ cargo add dioxus --features desktop
It's very important to add dioxus with the desktop feature for this example. The dioxus crate is a batteries-include crate that combines a bunch of utility crates together, ensuring compatibility of the most important parts of the ecosystem. Under the hood, the dioxus crate configures various renderers, hooks, debug tooling, and more. The desktop feature ensures the we only depend on the smallest set of required crates to compile and render.
If you plan to develop extensions for the Dioxus ecosystem, please use the dioxus crate with the core feature to limit the amount of dependencies your project brings in.
Our first app
Now, let's edit our main.rs file:
use dioxus::prelude::*;


fn main() {
    dioxus::desktop::launch(App);
}

fn App(cx: Scope) -> Element {
    cx.render(rsx! (
        div { "Hello, world!" }
    ))
}
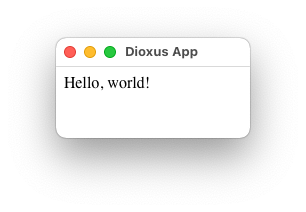
At this point, you could call cargo run and be greeted with a simple Hello, World! screen:
Dissecting our example
The use statement at the top of our app imports everything from the the prelude module. use-ing the prelude imports the right traits, types, and macros needed for working with Dioxus.
use dioxus::prelude::*;
This initialization code launches a Tokio runtime on a helper thread where your code will run. Then, the WebView renderer will be launched on the main-thread. Due to platform requirements, the main thread is blocked by your app's event loop.
fn main() {
    dioxus::desktop::launch(App);
}
Finally, our app. Every component in Dioxus is a function that takes in Context and Props and returns an Element.
fn App(cx: Scope) -> Element {
    cx.render(rsx! {
        div { "Hello, world!" }
    })
}
Writing fn App(cx: Scope) -> Element { might become tedious. Rust will also let you write functions as static closures, but these types of Components cannot have props that borrow data.
static App: Component<()> = |cx| cx.render(rsx!(div { "Hello, world!" }));
What is this Context object?
Coming from React, the Context object might be confusing. In React, you'll want to store data between renders with hooks. However, hooks rely on global variables which make them difficult to integrate in multi-tenant systems like server-rendering.
In Dioxus, you are given an explicit Context object to control how the component renders and stores data. The Context object provides a handful of useful APIs for features like suspense, rendering, and more.
Moving on
Congrats! You've built your first desktop application with Dioxus. Next, we're going to learn about the basics of building interactive user interfaces.